Today, I’ll host a static website with https on S3, I’ll use http://imyuvii.com as an example. Before starting you will need an AWS account and your DNS added in route53.
So Why to use S3 and why not EC2?
- It’ll be cheaper because you’re not paying for an always running instance and EBS volumes.
- You don’t have to worry about stability and patching of your container.
- You don’t have to worry about web servers.
There are not really significant benefits to using ECS over S3 for static websites - you’d really use it when you have dynamically generated content.
We’re going to use following AWS services.
- S3
- Certificate manager
- CloudFront
- Route53
S3 bucket
We’ll need two S3 buckets one for imyuvii.com and another for www.imyuvii.com

- imyuvii.com contains the static content for your website.
- Go to imyuvii.com bucket
- Go to properties
- Go to static website hosting
- Select option “Use the bucket to host a website”
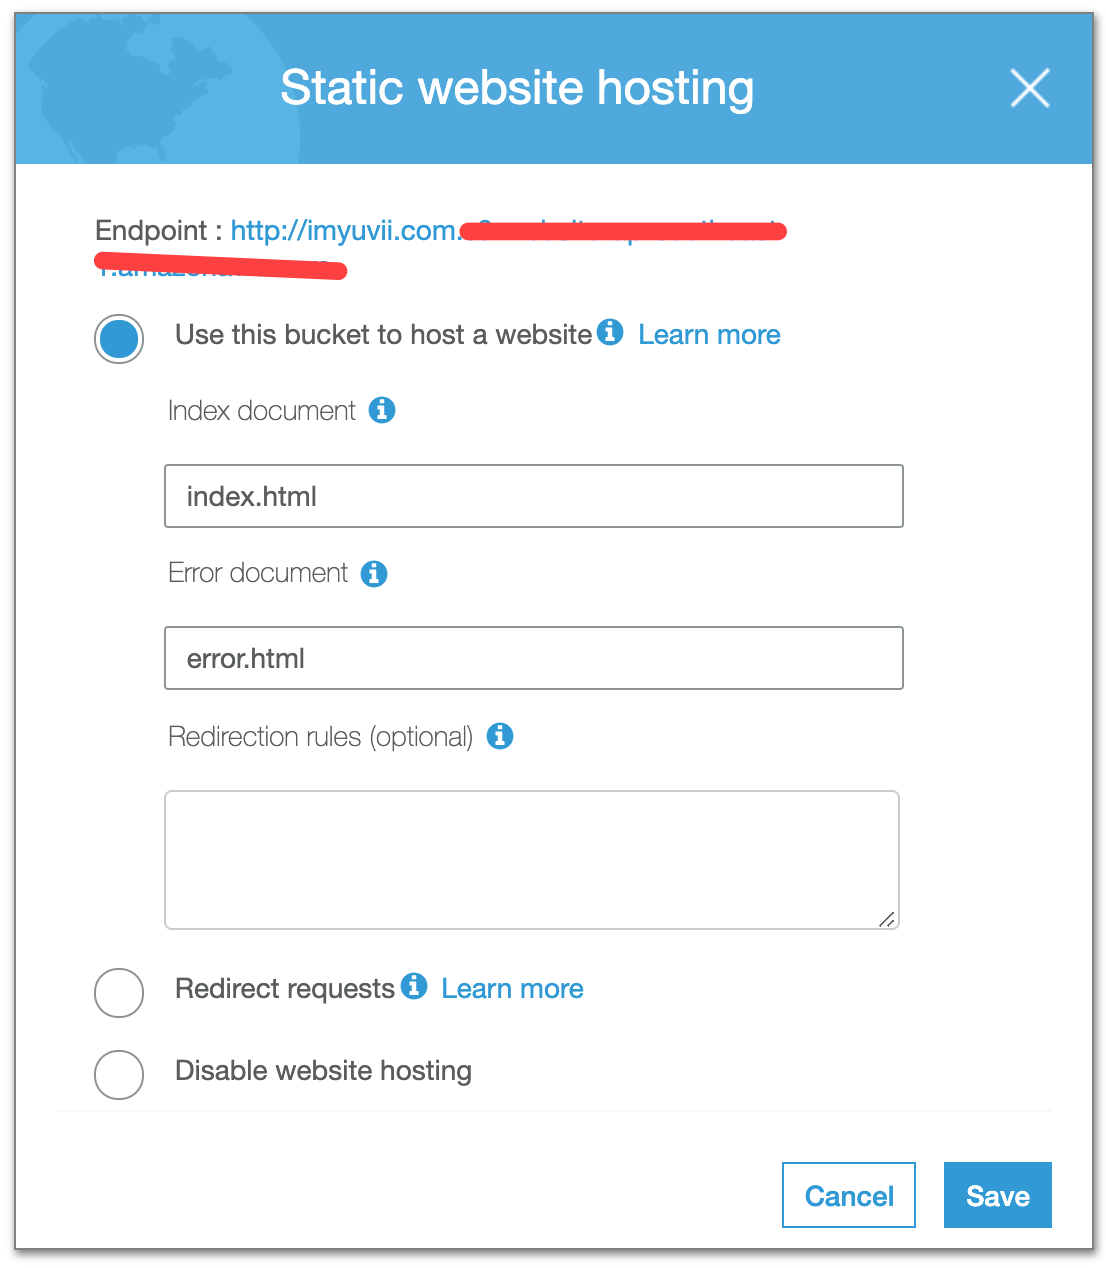
- www.imyuvii.com is an empty bucket with redirection rules. Which will help in redirect https://www.imyuvii.com to http://imyuvii.com
- Repeat the above steps for www.imyuvii.com and make little adjustment in bucket properties.
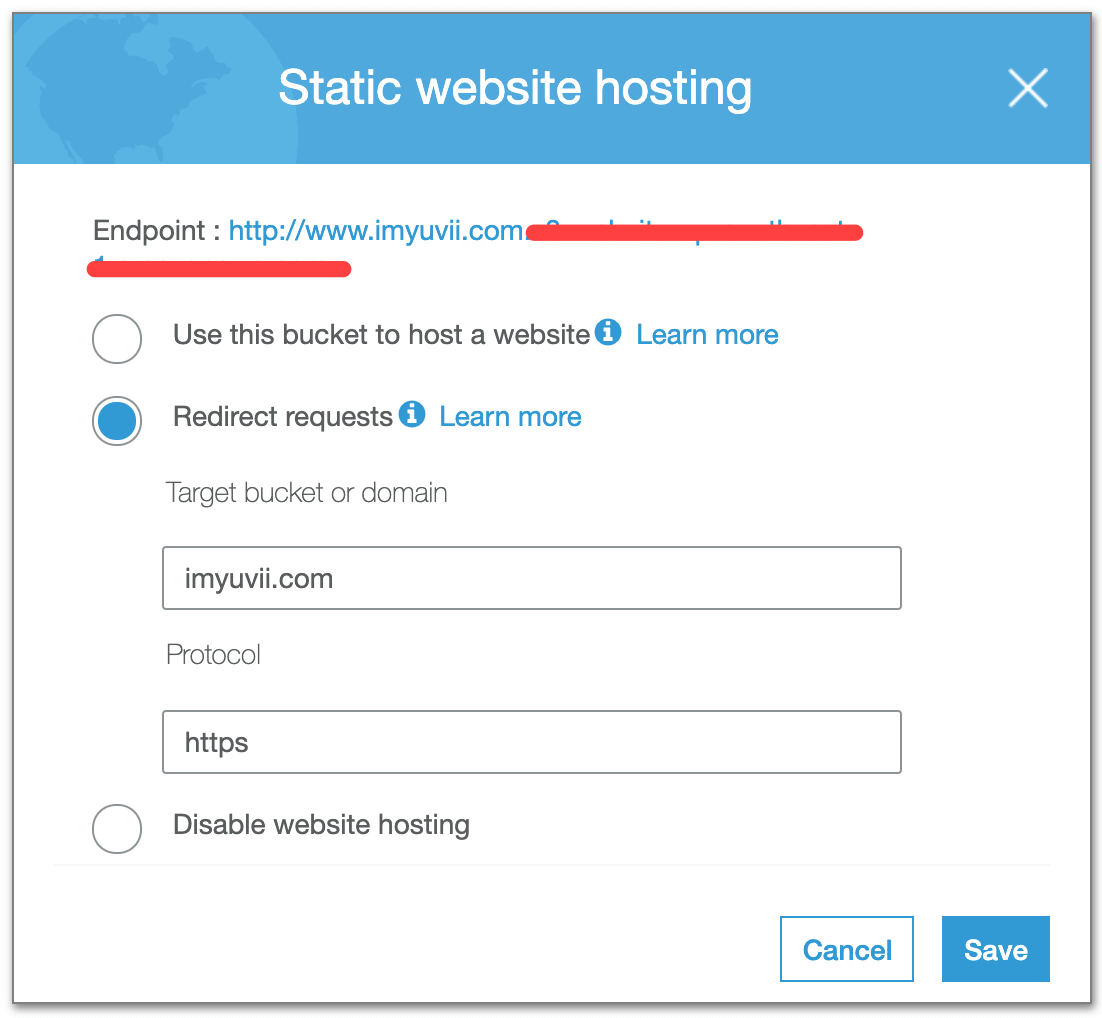
- Repeat the above steps for www.imyuvii.com and make little adjustment in bucket properties.
Do you see the endpoints in above screenshot. Kindly note it down those endpoints, we’ll use it at later stage.
Certificate manager
Public SSL/TLS certificates provisioned through AWS Certificate Manager are free. You pay only for the AWS resources you create to run your application.
- Go to certificate manager, Make sure you select the N. Virginia region.
- Press button Request a certificate and select option “Request a public certificate”
- Add domain names (imyuvii.com, *.imyuvii.com) and press next
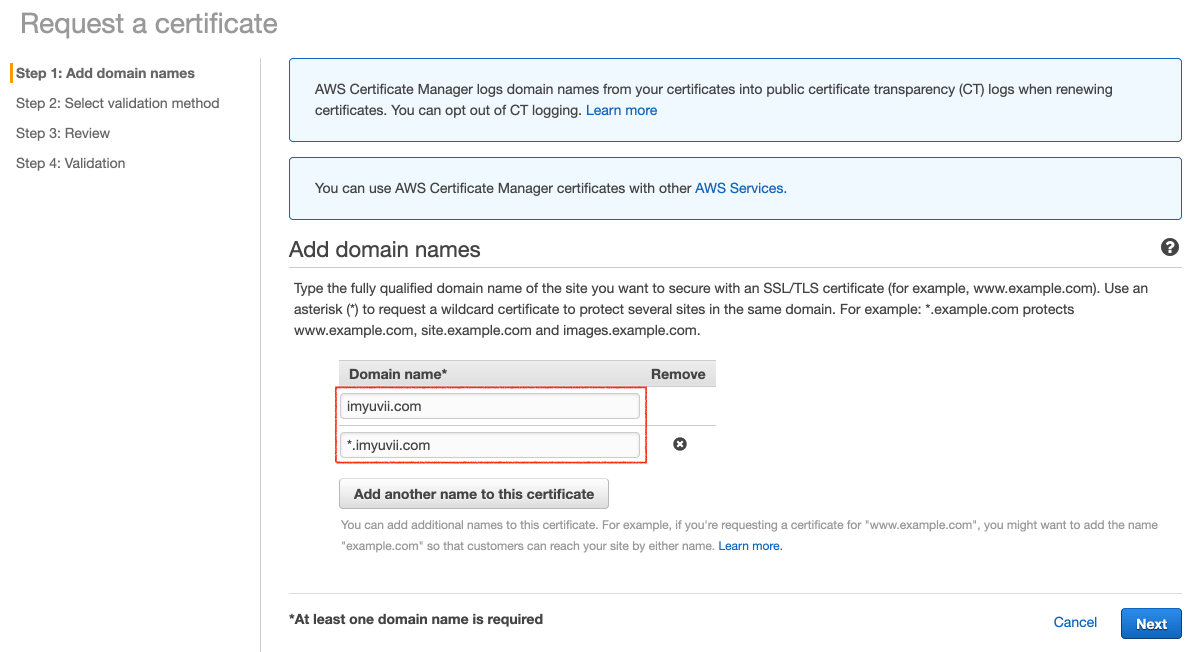
- Request the certificate from aws, It will take you to the “Select validation method” screen
- There are two validation methods, DNS validation and Email validation. I prefer “DNS validation” if you wish to select email validation than here is the link (https://docs.aws.amazon.com/acm/latest/userguide/gs-acm-validate-email.html)
- Review and it will take you to the validation screen
- Create records in route 53, It will automatically adds the records in your route53
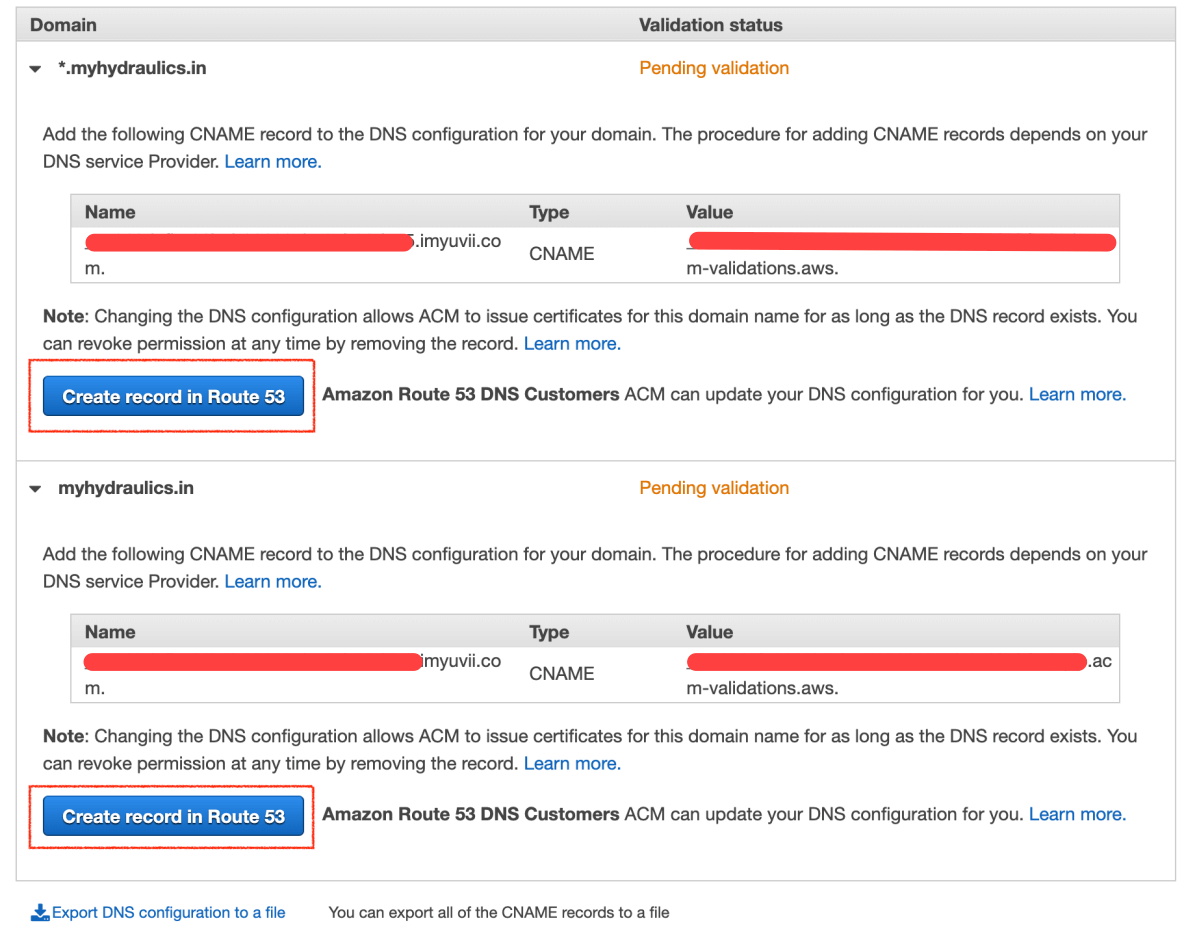
- Press continue and wait for certificate status changed to issued. It could take upto 30 minutes

CloudFront
S3 cannot support ssl on it’s own, so we’ll use CloudFront to support https on our static website which is quite straight forward.
Go to CloudFront, We’ll create two distribution one for imyuvii.com and another for www.imyuvii.com,
Let’s start with imyuvii.com
Click on create distribution, The form contains many fields but for us required fields are “Orignal Domain Name”, “Viewer protocol policy”, “Alternate domain name (CNAME)” and “SSL Certificate”
- Original Domain Name : S3 bucket static site endpoint, Do not select from the drop down, Copy from the S3 Bucket properties becasue –

- Viewer Protocol Policy: Redirect HTTP to HTTPS

- Alternate domain name (CNAME): imyuvii.com
- SSL Certificate: Custom SSL Certificate (select from dropdown)
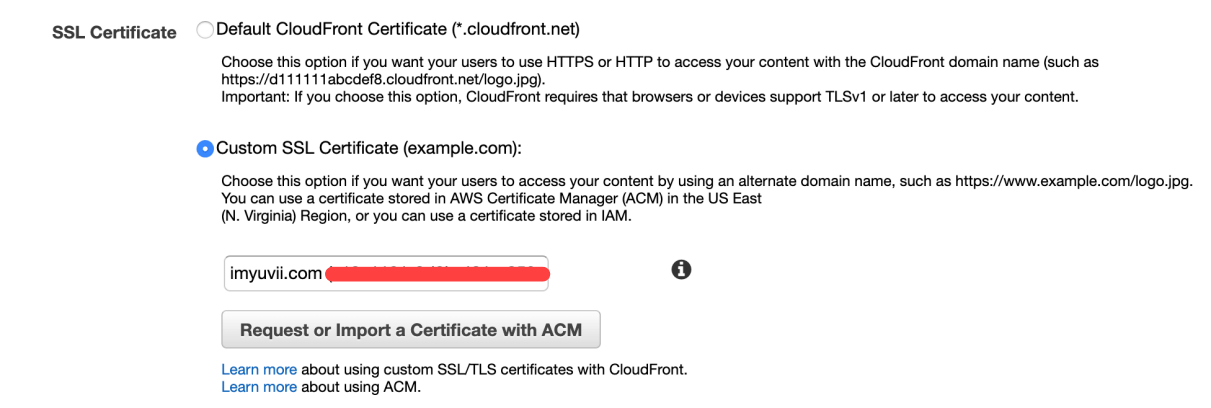
Repeat the distribution for www.imyuvii.com only difference will be the Orignal Domain Name and Alternate domain name field.
Route53
Next we’ll go to route53 and point domains to the cloudfront distributors.
Edit the A records for imyuvii.com and www.imyuvii.com, map it with cloudfront distribution.
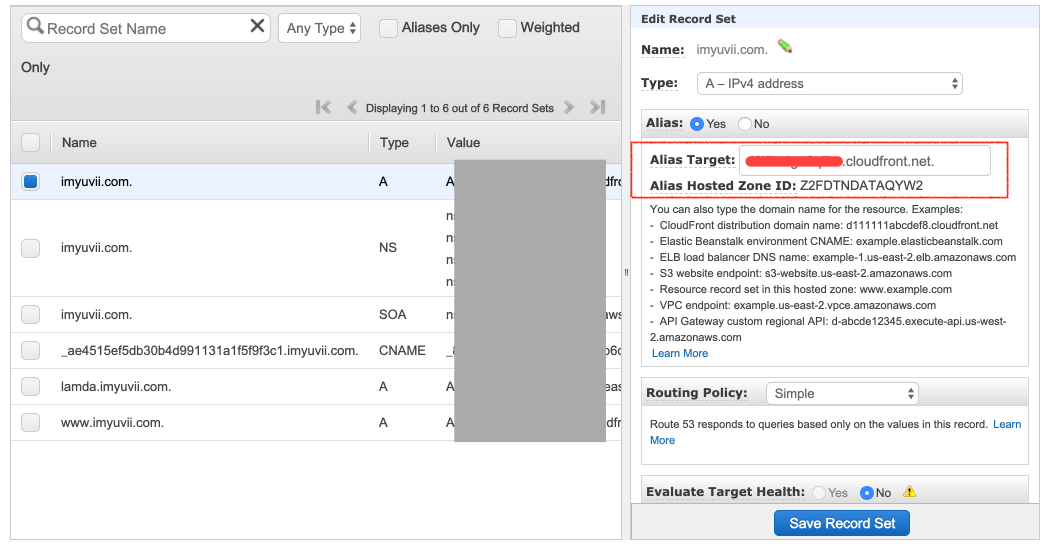
Now we just have to wait for cloudfront to finish the distribution. That’s it you’ve your https://imyuvii.com.
Cheers!!